

How To Set Up Husqvarna Sewing Machine
Both computerized and vintage sewing machines need regular care and cleaning. You wouldn't wait your car to keep running without the occasional tune-up, and neither will even a reliable sewing machine similar a Viking! The adept news is, you lot can often complete basic Viking sewing auto repairs yourself.
Troubleshooting and repairing a Viking sewing machine involves taking apart and cleaning it. A sewing machine may too need adjustments in tension, feed, or bobbin position. Replacing the needle, rethreading the needle path, and checking the feed dogs will besides set up several common issues.
In this article, you'll learn how to troubleshoot the most common sewing auto problems. You volition observe a pace-past-stride guide for tricky problems similar adjusting tension. Finally, you'll too get tips for when you need to step back and manus your machine over to a professional for help.
Is It Worth Repairing a Sewing Machine?
When something goes wrong with your sewing machine, you should almost e'er consider repairing it. You tin acquire to make many repairs yourself, and even going to a professional person will cost a lot less than ownership a new sewing auto!
Plus, older sewing machines can last for decades, given the proper care. New, computerized machines tin can last anywhere from five to twenty-five years, depending on their quality of structure.
Of course, learning how to provide bones maintenance for your machine will help prevent many big repairs down the road. Just like taking your car in for an oil change or tire rotation will help keep it running for a lot longer!
Near of the time, y'all tin easily fix issues like a broken needle, tangled-up tension, loose stitching, or jammed bobbin.
 Computer bug similar a touchscreen not responding might require professional person care. Depending on your skill level, you may feel confident disassembling mechanisms within the machine, or you may prefer to take that level of repair to a technician likewise.
Then, how much do y'all have to know to become a DIY sewing machine expert? Not that much! Information technology helps to sympathize the basics of how a sewing automobile functions.
You volition also want to take your sewing machine transmission on manus since that handy document will explicate many key maintenance and cleaning tasks. YouTube tutorials as well offer a helpful visual guide for many basic repairs. Finally, this article will walk y'all through the most common fixes you tin can use yourself to keep your Husqvarna Viking machine running.
Common Husqvarna Viking Sewing Machine Problems
Even really reliable sewing machines like Husqvarna Viking models run into problems on occasion. Depending on your sewing experience, yous may struggle more with some of these than others. Regardless, here are the meridian eight problems y'all may encounter while using your Husqvarna Viking sewing machine.
- Skipped or loose stitches: Caused past bent, broken, or dull needle or incorrect tension. Change the needle and loosen the top tension to gear up this issue.
- The needle snaps: Often caused past sewing over a pivot, button, or zipper. Using the incorrect presser foot could likewise cause a needle to break. Finally, check to make sure the needle and needle plate align correctly to avoid breaking any more than needles!
- Handwheel and needle-bar stuck: Bobbin tension gone incorrect can jam everything up. Try turning off and unplugging the machine, removing the bobbin casing and whatsoever tangled thread, and rethreading the machine. Then plough it back on and see if the wheel volition turn!
- Tangled thread beneath fabric: Mismatched tension can crusade "thread nests" to agglomeration up on the underside of your cloth. Rethread the machine. If this does not fix the event, attempt setting the top tension one level higher.
- Sewing automobile won't run: This ordinarily indicates a power supply issue. Turn everything off and unplug both the power cable and the human foot pedal cord. Then plug the cords back in and restart the machine.
- Broken needle thread: This one can take many causes, but the virtually common culprit is thread tension. As always, commencement past rethreading and and then adjust the tiptop tension to a lower setting. The wrong size of the needle, a muddy bobbin casing, and poor quality thread can also make thread break while sewing.
- Puckered stitches: This happens in the reverse of the more common skipped stitches. Information technology usually ways the meridian tension requires adjustment, though a also-large needle tin can as well crusade puckering in the fabric.
- Touchscreen won't respond: This could require calibrating in the device menu under Settings, or it could require professional servicing.
Husqvarna Viking Sewing Machine Troubleshooting
To troubleshoot your Husqvarna Viking machine well-nigh effectively, you should know how to perform a basic cleaning, how to thread your auto, whether or not to apply oil, and what your warranty covers.
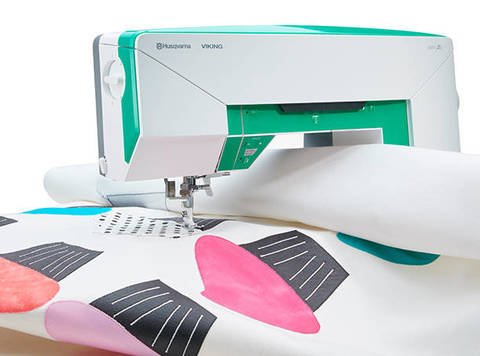
Simply first, here's a quick overview of what to expect from your Viking model.
Husqvarna Viking has a centuries-long history as a manufacturing visitor based in Sweden. Husqvarna began selling sewing machines in the belatedly 1800s, and the company still designs its new models in Sweden today.
The brand has a stellar reputation for delivering reliable, cutting-edge sewing technology.
That said, SVP Worldwide bought out Viking in the 2000s. Since then, the manufacturing of the machines has taken identify in Communist china.
Viking models made earlier 1900 are considered antique and may take collectible value. Models made betwixt 1900 and 1970 usually get termed "vintage." Some of these do have slight collectible value, but mostly they are valued because they contain solid metal parts and tin proceed running for decades!
Every bit you brainstorm troubleshooting your car, kickoff past finding out what yr information technology was made. This volition help make up one's mind the kinds of things yous can prepare.
Basic Cleaning
All sewing machines, old and new, fancy or cheap, crave regular cleaning! Unless you haven't serviced your auto in a long time, you lot tin can typically perform these tasks just in one case a calendar month to go along everything in tip-top shape.
- Outset by unplugging your machine: you may roll your eyes, simply it'due south not prophylactic to clean or disassemble whatsoever electrical appliance unless you lot unplug it commencement.
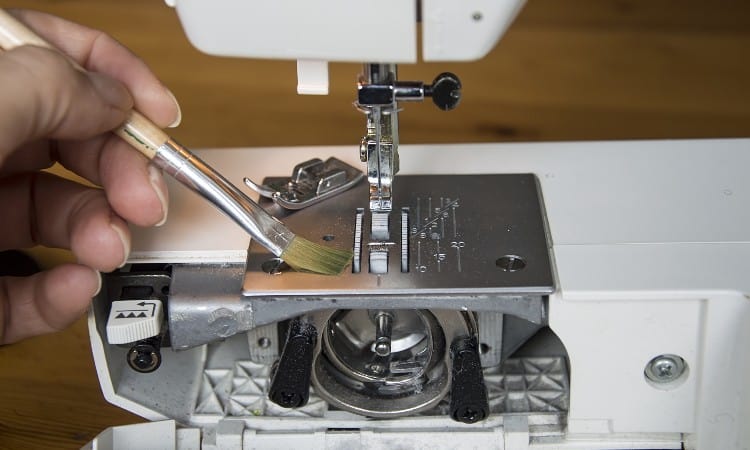
- Become rid of the lint: you know how dryers have a lint trap you take to pull out and regularly make clean when you do laundry? Well, sewing machines collect a buildup of fabric fibers also! Clearing out the lint around the bobbin casing and thread path will prevent your machine from getting clogged up over time.
- Get rid of the lint, advanced version: y'all should too unscrew the needle plate and make it there with a tiny paintbrush to brand sure no lint lingers! You shouldn't need to get this detailed more than once a month unless you run up all day, every day!
- Oil the auto (sometimes): older machines frequently require a few drops of sewing machine oil in cardinal places regularly. That said, most new machines should never, always be oiled! Check your transmission to discover out if you lot demand oil or not.
- Wipe down the body: modernistic machines typically have a plastic casing that yous can wipe down with a soft cloth. You should never utilize a moisture fabric on metal or cast-iron machines, as this could cause rusting.
- Replace the needle: you should replace the needle at the starting time of every new project, taking care to match the needle size and design to the project's needs. If you feel like that'southward too much, at least supercede the needle at your monthly cleaning session!
- Finally, exercise a test run on a bit of material to make sure everything works!
Does My Viking Sewing Machine Demand Oil?
Most newer Viking sewing machines do not require oil, while vintage models typically practise need monthly oiling.
Unless the sewing machine manual says otherwise, any automobile fabricated afterwards 1972 should non need oiling. You don't want to add together oil, as this will cause a mess and peradventure impairment the inner workings of your car!
Machines fabricated pre-1972 very probable volition need oil. Y'all tin determine this in two ways: Offset, read the manual. This volition spell out if you need to use oil and where to do so. 2nd, rub the needle bar and look at your fingers.
Did your peel come away feeling oily? In this case, the machine doesn't require oil at this fourth dimension. If your fingers practice not experience greasy, you need to apply oil!
With the caveat that y'all should always follow the directions laid out in your user manual, these steps will talk yous through the most mutual way to oil a Viking machine:
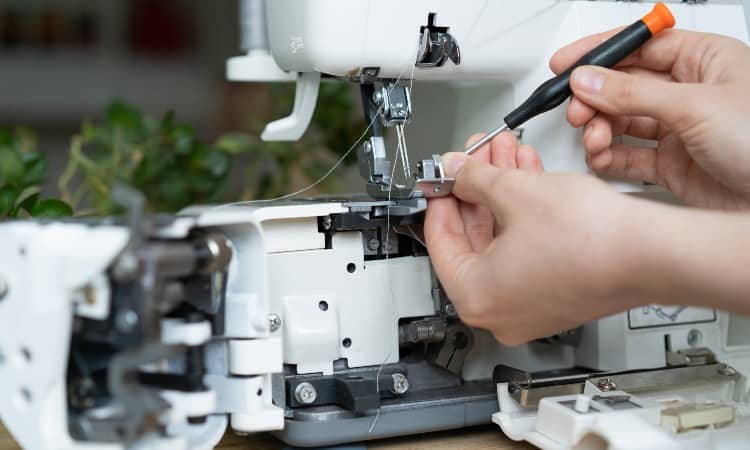
- Unplug the machine and set information technology on a flat workspace.
- Remove the bobbin, bobbin example, presser human foot, and needle plate. You may need a pocket-sized screwdriver for some of these parts.
- Give each part a quick dusting with a clean castor and gear up bated on a clean cloth.
- Remove the race (the surface area that holds the bobbin case). As a pro tip, snap a pic with your smartphone earlier taking this out, so you can easily put information technology dorsum correctly!
- Use your castor to go out any lint that could soak up your oil in the race area and beneath the feed dogs.
- Turn the handwheel and put a tiny drib of oil on any metallic part that moves. Endeavour to avoid any plastic parts or gears.
- Smudge a tiny bit of oil around the race area.
- Insert the race and needle plate, only leave the needle out. Plug in the car and run it for a few seconds to make sure the oil moves around the metal parts.
- Finally, assemble the bobbin casing, bobbin, presser pes, and needle. Utilize a scrap of fabric to sew a test run for a moment.
How to Thread a Viking Sewing Car
Knowing how to thread your Viking machine is key to keeping it running smoothly. 9 times out of ten sewing auto problems just need a quick rethreading to become everything dorsum on track!
Here's the catch, though: every model looks a bit different. Vintage models, in detail, may have a unique thread path, while brand-new models may have easy, color-coded thread paths to help guide your fashion!
Your best bet to make sure you thread your machine right is to read the owner's manual and follow the directions laid out there.
That said, the basics of threading look pretty similar for most machines.
- Slide your spool of thread onto the spool pin and secure information technology. Most machines come with a plastic spool cap that keeps the spool from flying away into the air as you stitch!
- Pull about ten inches of thread free.
- Wrap the loose end of the thread around the thread guides and so through the tension discs. Yes, this is the catchy part, but don't panic! Most machines have numbers printed side by side to each of these parts to tell you where and how to wrap the thread.
- As a pro tip, make sure the presser human foot is raised to keep the tension discs separated as you do this.
- Follow the arrows to slide the thread downwardly to the needle.
- Place the thread in the final thread guide (ordinarily a small metallic claw) right in forepart of the needle.
- Use an automated needle threader or thread the needle by hand.
If you larn better visually, effort typing the exact model number of your Viking machine into Youtube. You lot volition near certainly observe handy video tutorials that will evidence you lot how to thread your car.
Warranty
If you bought your machine new, information technology typically comes with a warranty. This guarantees help from trained Viking technicians if you need information technology.
Nevertheless, if you accept autonomously or mess with the automobile yourself, you could void the warranty! This makes sense: Viking has no way to know if their machine caused the problem or if you damaged something while poking around within it.
Considering of that, you lot should read your warranty before doing annihilation more complicated than a basic cleaning for your auto.
If you lot bought a used machine, you lot don't need to worry about this!
Viking Sewing Machine Repair
Equally you lot consider repairing your Viking sewing machine, you will need to know what common errors to expect. You may also need to know where to look for replacement parts. Perhaps about chiefly, you volition need to know when to throw in the towel and take your auto to a technician for the repair!
How Exercise You Service a Viking Sewing Auto?
To service your own Viking sewing machine, you should know how to perform bones cleaning and how to replace often worn-out parts like needles.
To learn how to clean your machine, refer to your user'south manual, or check out the "Basic Cleaning" section earlier in this commodity!
Y'all will besides want to go comfy with a tiny screwdriver that will allow you to remove and supercede the needle, remove the needle plate, and even adjust the bobbin casing as necessary.
Unremarkably, you will become a small screwdriver and several other cleaning tools when you lot purchase a machine. Otherwise, attempt a diverseness of modest flat-head screwdrivers to detect one that fits your machine.
Since you need to supervene upon your needle and so often, check out this quick guide for reference:
- Use your small-scale screwdriver to loosen the needle ready screw. You don't demand to pull it out all the way because the needle will driblet out equally you loosen the screw.
- Gently slide the needle down out of the needle bar. If you haven't done this oftentimes, note which side of the needle has a rounded and apartment side to correctly insert the replacement needle.
- Insert the replacement needle butt into the needle bar until yous can't gently-simply-firmly push information technology in any farther.
- Tighten the needle set screw again.
Finding Parts
If y'all observe a damaged part inside your machine, you will need to find a replacement. You tin can go about this in multiple different ways.
If you lot have a newer machine nevertheless under warranty, yous should contact the company directly. They volition nearly certainly provide parts and repairs for free. Yous volition demand to either pay for shipping or bulldoze to a certified technician, though.
If you have a new-ish machine non under warranty, you can probably find replacement parts through a certified Viking store or the visitor's website. You will then demand to decide if you want to install the office or if you lot want to pay a technician for the repair.
Finally, if you have an older car, you lot're going to have to dig a bit deeper. Husqvarna does not provide a lot of back up for older machines. It can prove challenging to track downwardly data or parts for these vintage models.
Your best bet is to check eBay, Etsy, or Amazon for vintage Viking parts.
Some trained technicians will work on vintage Vikings, merely don't count on the certified Viking dealers and shops for this service! Many of their technicians no longer receive preparation on older models.
Professional Aid
This leads to the question of when you should leave repairs to the professionals. Honestly, this depends on your comfort level.
If you feel confident in connecting wiring, go for it! Almost of the time, though, electrical or computer issues get pretty complicated. It'southward probably a good idea to go out these to trained technicians.
Touchscreen issues on new Viking models are a perfect example. You can endeavor turning the sewing machine on and off and going into the bill of fare to reset your settings, but if that fails, yous probably don't want to mess with anything further!
Also, if you tried the most common fixes and your auto still won't run correctly, you might want to take it into the shop. For example, suppose your needle breaks repeatedly as you sew. If y'all already tried adjusting the needle plate, something could have gone incorrect in a much more complicated way, perchance with your feed dogs.
Speaking of which, feed dogs can habiliment out over time. While you tin certainly replace this mechanism yourself, it requires precision and skill that may best be left to the technicians.
The bottom line is that you should attempt any repair y'all think you tin handle. If yous feel uneasy or just don't accept the fourth dimension to learn how to fix something, consider finding a nearby Viking repair technician.
How Exercise I Fix the Tension On My Husqvarna Sewing Machine?
Learning how to suit the tension on your Viking machine will assist you prevent many common sewing bug like skipped stitches or thread nests! Ane of the most oft-asked questions regarding almost all sewing machines is, "how do I arrange the tension?"
Thread tension works past putting a certain amount of force, or strength, on the threads that come from the thread spool and the bobbin. The tension mechanisms piece of work separately. Ordinarily, the top tension will demand adjusting very often, while the bobbin tension rarely requires adjustment.
Pretty much whatever kind of messy stitching that does not show flat, even stitches on both sides of the fabric, means that you need to make a tension adjustment. Different kinds of fabric often need different levels of tension besides.
The only exception to this rule is having a fancy, high-end sewing machine that automatically adjusts tension for you!
On some new Viking models, you tin use the impact screen to adjust tension settings. On other models, you lot volition find a dial you tin spin to set the tension.
Setting the tension to a higher number volition increase the resistance confronting the thread, giving you greater tension in the stitches every bit you sew together. Likewise, lower numbers will indicate less tension equally you sew.
You can easily examination the tension by using contrasting colors of thread in your bobbin and thread spool. So, check to come across if either of the threads puckers, skips, stitches, or knots up as you sew together!
Human foot Pedal Not Working
If you press downwardly on the foot pedal and nothing happens, y'all should first bank check the connection indicate where the foot pedal plugs into the machine. If unplugging and replugging doesn't work, look for a loose wire where the cable connects to the foot pedal.
If yous feel brave, open upwardly the plastic casing of the foot pedal and see if yous tin spot whatever loose or cleaved wires. A connection may have jiggled loose inside.
If this fails, you lot probably need a new human foot pedal. Fortunately, you can typically get these pretty cheaply! You lot will want to make sure y'all buy the right pedal designed for your machine, though.
Feed Dogs Stuck Downwardly Position
Stuck feed dogs will bring your sewing to a screeching halt.
The feed dogs look like tiny teeth in the center of the needle plate. They run like footling treadmills to keep the textile moving beneath the needle as you lot sew. Of grade, this means that things go wrong when your feed dogs go stuck!
Near oft, this happens when lint or thread jams up the feed dogs, preventing them from moving. If y'all clean your machine regularly, this shouldn't happen!
Wrong threading could besides cause the feed dogs to jam and refuse to move, so ever endeavour rethreading your auto just in example.
What to Practise If Your Viking Sewing Machine Jams Up
If your sewing machine jams up and you can't turn the handwheel at all, yous may need to either rethread the car or disassemble some components before getting it running once again.
First, try removing the fabric from under the presser foot. This may require pair of scissors! Then rethread everything. Rethreading fixes jams more often than you might remember!
If that didn't work, follow these steps:
- Check the power cord and make certain information technology'due south plugged into your sewing auto and the wall outlet correctly.
- Endeavor turning the machine on and off.
- Cheque the human foot pedal for loose wires and plug information technology firmly into the machine.
- Bank check the bobbin casing and make sure no loose thread has tangled it up, preventing the bobbin from turning.
- Clean the hook and oil information technology if your manual indicates information technology is safe to do and so.
- And then reassemble the bobbin and bobbin casing, and plow the handwheel to meet if information technology moves!
Husqvarna Viking Dealers Nearly Me
 If you're looking to buy a Viking automobile or in need of a certified Viking technician, you volition want to observe a dealer or shop near you. Y'all tin typically locate a certified online dealer or physical shop by Googling. You tin can also get to Husqvarna's website to locate an official store near you.
Of form, you can take your car to a local mom-and-pop repair store and hope for the best. But if your machine is still under warranty or if yous want 100% certainty of success, make certain your technician is certified to work on Viking machines!
Sewing machine repair requires lots of grooming and certification, so yous should wait to pay a pretty hefty fee for most services. A basic melody-up will typically cost effectually $100, for example. Some technicians charge by the hour plus parts, similar car mechanics. Others may charge by the type of repair.
Yous should bring your machine, the ability cord, the human foot pedal, and the bones zigzag foot with you when you lot go to a repair shop.
Conclusion
Even really neat sewing machines like Husqvarna Viking models will occasionally need repairs or bones troubleshooting. Y'all can easily teach yourself how to replace needles, conform tension, and remedy jams. Of class, keeping upwards with a monthly cleaning schedule will also assistance your machine run similar a dream!
Knowing how to find a reputable, certified Viking technician can rescue your sewing machine when all else fails.
What kinds of sewing machine issues have yous tried to troubleshoot? How did you fix the problem? Leave a annotate below to let us know!
Source: https://silverbobbin.com/husqvarna-viking-sewing-machine-troubleshooting/
0 Response to "How To Set Up Husqvarna Sewing Machine"
Post a Comment